GST in India : Since 1st July 2017 India is following GST like many countries. GST or the Goods and Services Tax is a value-added tax applied on goods and services sold for domestic consumption.
Configuring GST is very easy in Woocommerce. To configure GST you don’t need any plugins, all in built into Woocommerce. Follow simple steps to setup GST in Woocommerce.
Step 1: Enable Tax ➥
In Wordpress Admin Dashboard, go to
WooCommerce > Settings > General
Now scroll down and check on Enable tax rates and calculations
Step 2: Configure Woocommerce Tax ➥
Next navigate to
WooCommerce > Settings > Tax,
and select Tax options sub tab and configure the tax as per your need.
Step 3: Import the GST ➥
You can enter the tax rates manually one by one, but we recommend you use our the CSV file to import Woocommerce Tax rates India GST Tax Rates as a starting template and modify it as per your need.
Download CSV file India GST Tax Rates
Now go to WooCommerce > Settings > Tax
Then select sub tab Standard rates and import the above downloaded CSV file using Import Tax button at the bottom.
Step 4: Customize Tax rates for your state ➥
Our CSV tax rates file is configured for Tamilnadu as shop location/seller state and 18% as tax slab, If you are in Tamilnadu then you can leave as it is.
For other states you need to do small modification. Woocommerce is using ISO code for country and states, refer article Indian states ISO code to find the code for a state.
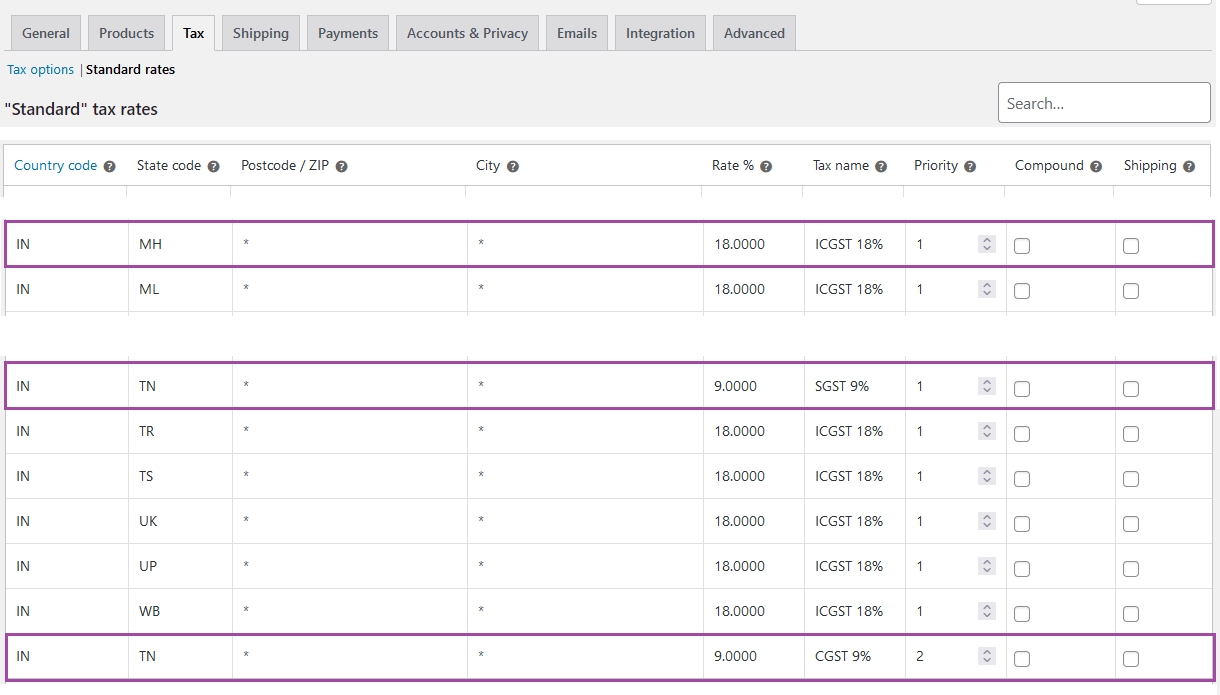
For example if your seller state is Maharashtra then in the woocommerce tax table you need to swap state codes of Maharashtra (MH) with Tamilnadu (TN)
from
MH => IGST18%
TN => SGST9%
TN => CGST9%
to
TN => IGST18%
MH => SGST9%
MH => CGST9%
Here we have highlighted the rows in woocommerce tax table
